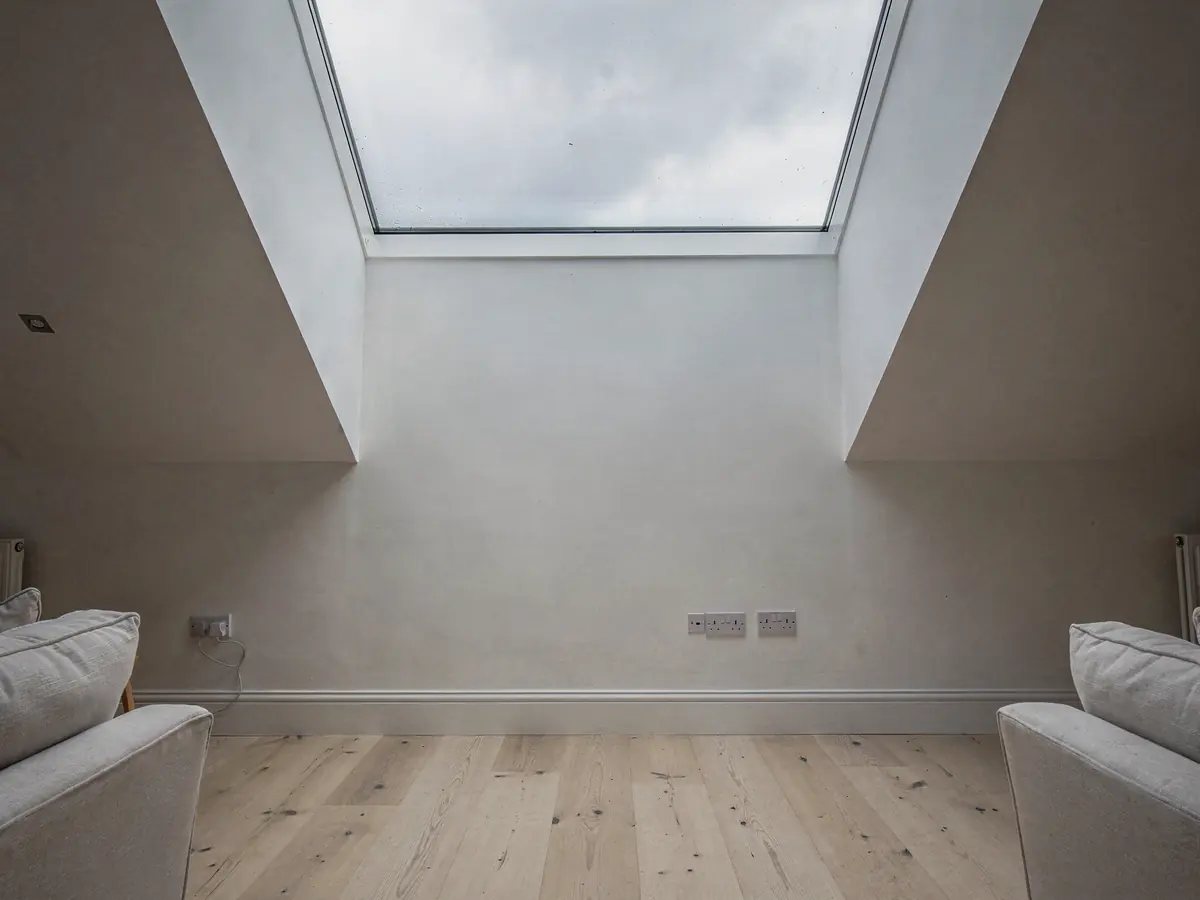
What a flat rooflight upstand does
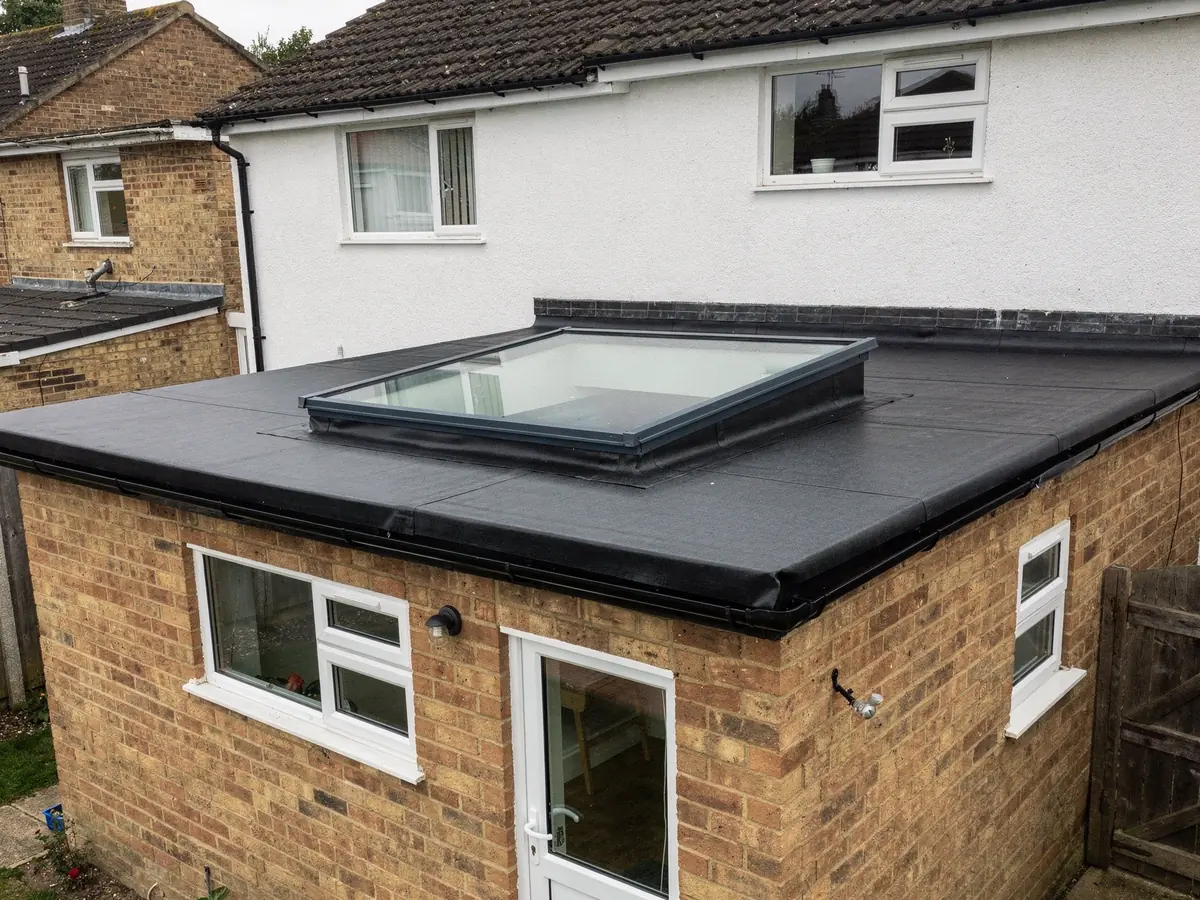
A flat roof is a surface that drains. Water runs across it towards a gutter or outlet, and the roof covering is laid to keep it moving. A rooflight sitting directly on that surface would sit in the path of the water, with every joint at the lowest point on the roof. The upstand solves this. It is a raised edge around the opening, built up from the deck, and the rooflight frame sits on top of it instead of on the roof itself.
That raised edge has three jobs. It lifts the junction between glass frame and roof covering above standing water and snow melt. It gives the roofing membrane a vertical face to be dressed up, so the seal is made on a wall and not on a flat joint. And it carries the insulation that stops the opening becoming the coldest part of the ceiling. A skylight kerb upstand done well is nearly invisible once the job is finished; done badly, it is the first thing that shows.
Most of what follows applies to rectangular flat rooflights, from a single frameless unit over a kitchen island to a row of three along an extension. Pitched roof windows use a flashing kit instead, covered in our guide to roof window flashing kits. The parent service page, flat roof rooflight installation, places this detail within the whole job.

How high should a rooflight upstand be?
The figure most often quoted is 150mm above the finished roof surface, which comes from BS 6229, the British Standard for flat roofs with continuously supported coverings. It is a typical kerb height rather than a magic number, and manufacturers of rooflights state the minimum they need for their own warranty. The height is measured from the top of the finished roof covering, not from the bare deck, because the deck will later receive insulation and a membrane that add to the build up.
That distinction catches people out. A kerb cut to 150mm above the deck may end up well under 150mm above the finished surface once a thick insulation board and a membrane go over it. So the upstand is set out from the finished roof build up, and the survey records the intended layers so the carpenter cuts to the right figure.
Taller is not always better. The higher the kerb, the more it shows from the garden, the more it adds to the overall height of the unit, and the more it matters for planning. A raised flat rooflight on a tall upstand stands further proud of the roof than a flush one, which can matter for permission; the rooflight planning permission guide gives the projection rules. A low kerb gives a flatter look, but it must still clear the covering and give the membrane enough height to be dressed properly.
Where a roof will later gain a green layer, ballast or paving, the upstand needs to be taller to allow for it. The job plan states the intended finished height, so there is no argument on the day.
Builder's upstand or integral upstand
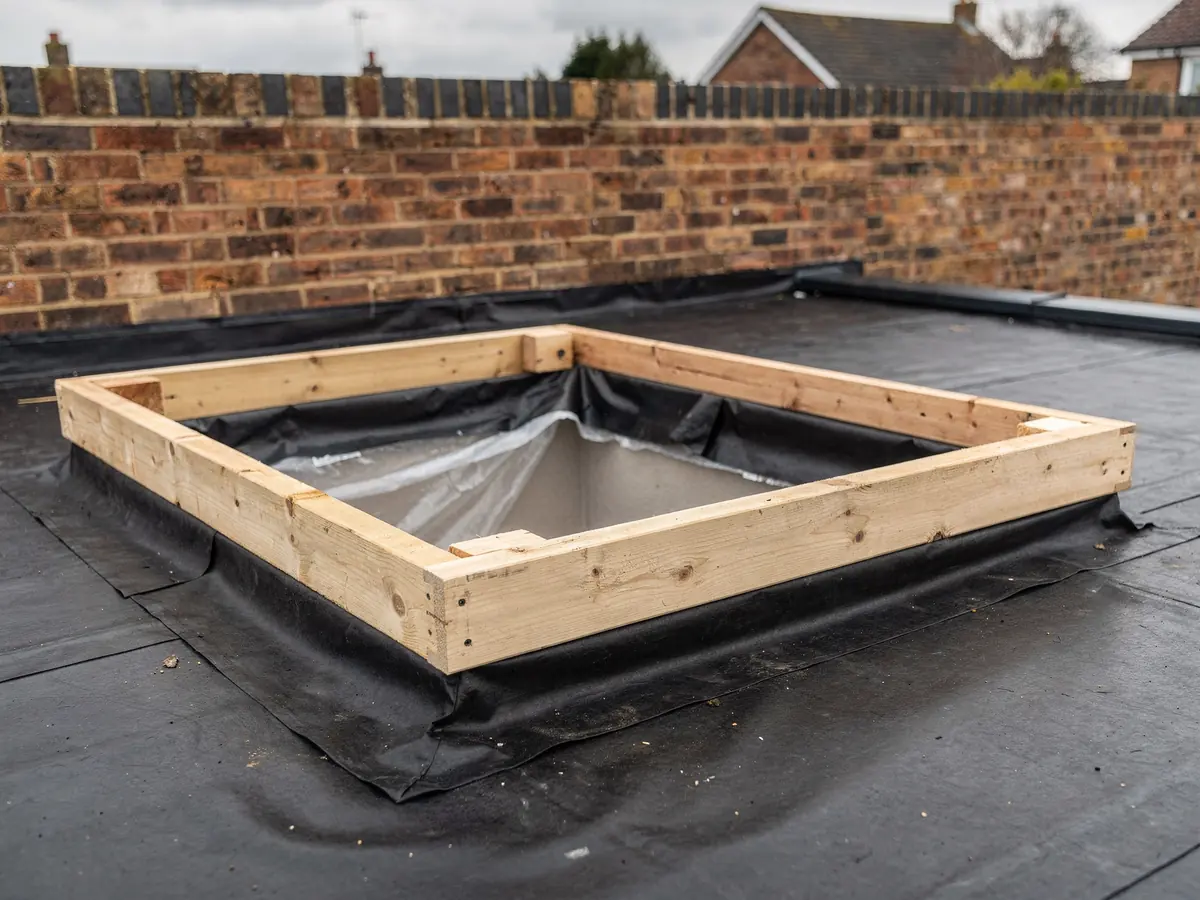
There are two ways to raise a rooflight. A builder's upstand, also called a site-built kerb, is made on the roof from timber, usually treated softwood or plywood, fixed to the deck and the joists around the opening. The roofer then covers it with insulation and membrane. An integral upstand is part of the rooflight product: the manufacturer supplies an insulated, pre-formed kerb already bonded to the unit or designed to fit it, and it is bolted down and dressed.
The builder's upstand has the advantage that it adapts to an awkward opening, a deck that is not quite level or a roof that needs an unusual height. The weakness is that quality depends on the carpentry and the insulation detail made on a cold roof, in all conditions. The integral upstand arrives as a controlled factory item, with the insulation already in place and consistent dimensions, but the opening must be built to suit it, and the lead time is longer.
| Point | Builder's upstand | Integral upstand |
|---|---|---|
| Made | On site, from timber | In the factory, supplied with the unit |
| Insulation | Added by the fitter around the timber | Built in and consistent |
| Fits awkward openings | Yes, shaped to suit | Opening must match the product |
| Order lead time | Short for the kerb, unit still ordered | Longer, made to the size |
| Best suited to | Refurbished decks, odd sizes | New extensions, frameless units |
Do you need an upstand at all?
For a flat rooflight, yes. Glazed units for flat roofs are made to sit on a raised base, and a frame set straight onto the roof covering has no clear seal line and no protection from water pooling at its edge. The question that really arises is whether the existing roof already has a kerb. Replacing one flat rooflight with another often reuses the old upstand, provided it is sound, at the right height and large enough for the new unit.
That reuse is checked, not assumed. On a first visit we look at the timber for rot or movement, the height above the finished roof, the insulation inside it, and how the old membrane was dressed. A kerb that has been wet for years, or one that was never insulated, is better rebuilt than recycled. What that decision looks like on site is described in the replacing a rooflight guide.
Roof lanterns follow the same logic with taller, heavier frames. The flat roof lantern page, roof lantern installation, explains why those kerbs are often built and checked separately.
Building in the fall
No flat roof is perfectly level. The deck is laid with a slope, called a fall, so that water runs to an outlet instead of standing. Where a rooflight interrupts that slope, the water has to go round it. The upstand therefore needs the roof around it to fall away on all sides, with no hollow trapped behind the up-slope edge.
The up-slope side is where problems start. Water running down the roof meets the kerb head on and has to divert around its corners. If the deck there is flat or dips, a pond forms against the kerb. In a well planned job, a small raised area called a cricket, a wedge-shaped build up behind the kerb, steers the water sideways. The fitter sets it out when the deck is open, before insulation goes down.
The roof's overall slope is a separate subject, dealt with under the lowest pitch a flat rooflight can sit on. For the upstand, the point is local: whatever the roof's general fall, the area immediately around the opening must drain. The survey notes the direction of fall and the position of the nearest outlet, and the job plan records where the cricket goes.
- Direction of the roof's fall, noted at the survey
- Position of the nearest outlet or gutter
- Whether the up-slope side needs a cricket
- Clear run for water on both sides of the kerb
- Kerb set on a level, supported deck
Insulating the upstand
A bare timber kerb is a thermal gap. Heat leaves the room through the timber, and the inside face of the reveal gets cold enough for condensation to form on it. Insulating the upstand fixes this at the source. Rigid insulation boards are fixed to the outside of the timber, or foam is bonded to it, and the membrane covers the lot. Some integral upstands include this layer already.
The energy rules for existing homes give rooflights their own thermal ceiling, set by Part L. That number belongs to the glazed unit, yet the build up around it has to back it up. A well insulated glass unit on a poorly insulated kerb gives away much of the benefit, which is why the insulation detail is part of the specification, and not left to the roofer to decide. The energy efficient rooflights page covers the glass side.
So the answer to whether a rooflight upstand should be insulated is yes, on the outside face and continuous with the roof insulation, so there is no break between the two. The inside of the kerb is also lined, as covered below. Where the opening is part of a new extension, the roof insulation is usually designed first and the kerb detail follows it.
Dressing the membrane up the kerb
Membrane is the waterproof layer of the flat roof, whether single ply, EPDM rubber, GRP or felt systems. Where it meets the upstand it is turned up the outside face in one continuous sheet, so the joint with the flat roof is under the upstand's protection. This is the dressing. The membrane is bonded to the kerb, formed neatly at the corners and then finished under the rooflight's flange or a metal capping.
Corners are the test of workmanship. A square corner needs the membrane folded or a preformed corner fitted, because a simple cut and stick leaves a weak spot. The top edge is finished so water running down the glass frame falls onto the face of the membrane and drains away, rather than behind it. Fixings pass through the dressing only where the manufacturer's detail allows, and they are sealed.
Which membrane the roof carries decides the method. EPDM is bonded and formed in the roofer's usual way; GRP is laid wet and finished on the kerb; single ply may be welded. Where an old roof gets a fresh opening, the survey names the covering, and the job plan says whether the new dressing can be joined into it without a visible line or a weak seam.
The internal reveal and how it finishes
Inside, the upstand continues as the reveal, the short wall that runs from the ceiling up to the glass. Its depth is the kerb height plus the roof build up, so it can be considerable. The reveal is lined with insulation and then boarded and plastered, or finished in a pre-formed plastic or aluminium lining, to give a clean white edge to the opening.
Angled reveals splay outwards, while square ones run straight up. A splay usually lets more daylight into the room, but it needs a deeper opening and more finishing work. A square reveal is tidier on a modest opening and sits well in a modern kitchen extension. The choice is made at survey, and a sample of the finish is discussed before the order.
Moisture is the thing to watch. A reveal that is cold, or damp from a newly plastered surface, can show marks, so the plaster is left to dry and the decorating waits. Our answer on rooflight condensation explains why a warm, insulated reveal matters. Photos of finished openings appear in the frameless flat rooflights guide, where the thin frame leaves the reveal as the visible feature.